Monday, July 24, 2017

The Bathroom is (Almost!) Done!!!

Well, the morning started out with a phone call to my flooring contractor.  And much to my surprise, he said that he would be over right away to fix the mistake.  I guess a project he was supposed to do today didn't pan out, so he had some free time.  He was over within the hour, and he went to work right away on the cut.  He had the tools, and he had the problem fixed in less than 10 minutes.

Woo hoo!!!

So not only could I officially put my bathroom back together, but I could take back the diamond blades, too!  Money saved!

I was able to put the toilet extension on with no problems, so the bathroom was ready for a toilet!  But not before some more paint...

The toilet flange extension is in!
 I sanded, then painted the drywall patch jobs and the area behind the mirror.  And, yes, this time I chose the right color!  I also installed a different faucet in the sink.  I had mistakenly chosen a "bar faucet" which meant that there was no drain.  So I took that back to Menard's and surprisingly found a Moen faucet that also had a $30 rebate.  I was going to spend full price, but the rebate printed off at the register!  I should have bought two more for upstairs!

The space was tight, but the drain fit right next to the drawer.

The wall is sanded and painted!  Ready for a fixture and mirror!

Almost ready for a new toilet!
Now ready for a new toilet ffter the paint and trim!
So I hooked up the new faucet, installed the brand-new toilet, installed a brand-new light fixture, and added the brand-new mirror.  For the light fixture, I was shocked at the prices in the store!  But I searched and searched, and I found a display model that was on sale.  I had to help the store associate disassemble it (he didn't know how), but I was out the door with a trendy fixture for $34.99.  I know, right, on sale?!  No box, no warranty, and some dust that had to be cleaned.  But it was perfect.

And just like that, this moldy bathroom that just two weeks ago had nothing but a drab 1991 feel to it, was modernized to a brand-new 2017!  I seriously love it.  I don't know the exact total until I do my receipts, but I think I was able to update the entire bathroom for around $900.  New tile floor, new vanity, new toilet, new mirror, new light fixture, new paint.  That's just a smart move!


The new bathroom!
But just to remind me that nothing can be easy, I went to install the last piece of the puzzle:  the door.  And that's when I realized that the door did not fit.  It will have to be cut!!!  With the new tile, the floor raised up too much.  It's an easy fix, but it's yet another reminder that there are surprises at almost every turn!

The hinges are off!  The door has to be cut.

The door drags along the floor.  Aghhhh!!!
But what a relief.  I now have a cute little bathroom!

I love it!

Sunday, July 23, 2017

Huge Strides Forward!!! And Set Back Again...

I love when progress is made!  So much about profitably fixing a foreclosure home is setting plans, budgeting, being frugal when you can, and working your tail off.  After a fairly successful day yesterday, I had another good day today!  Not without its challenges and gambles, but today they paid off!

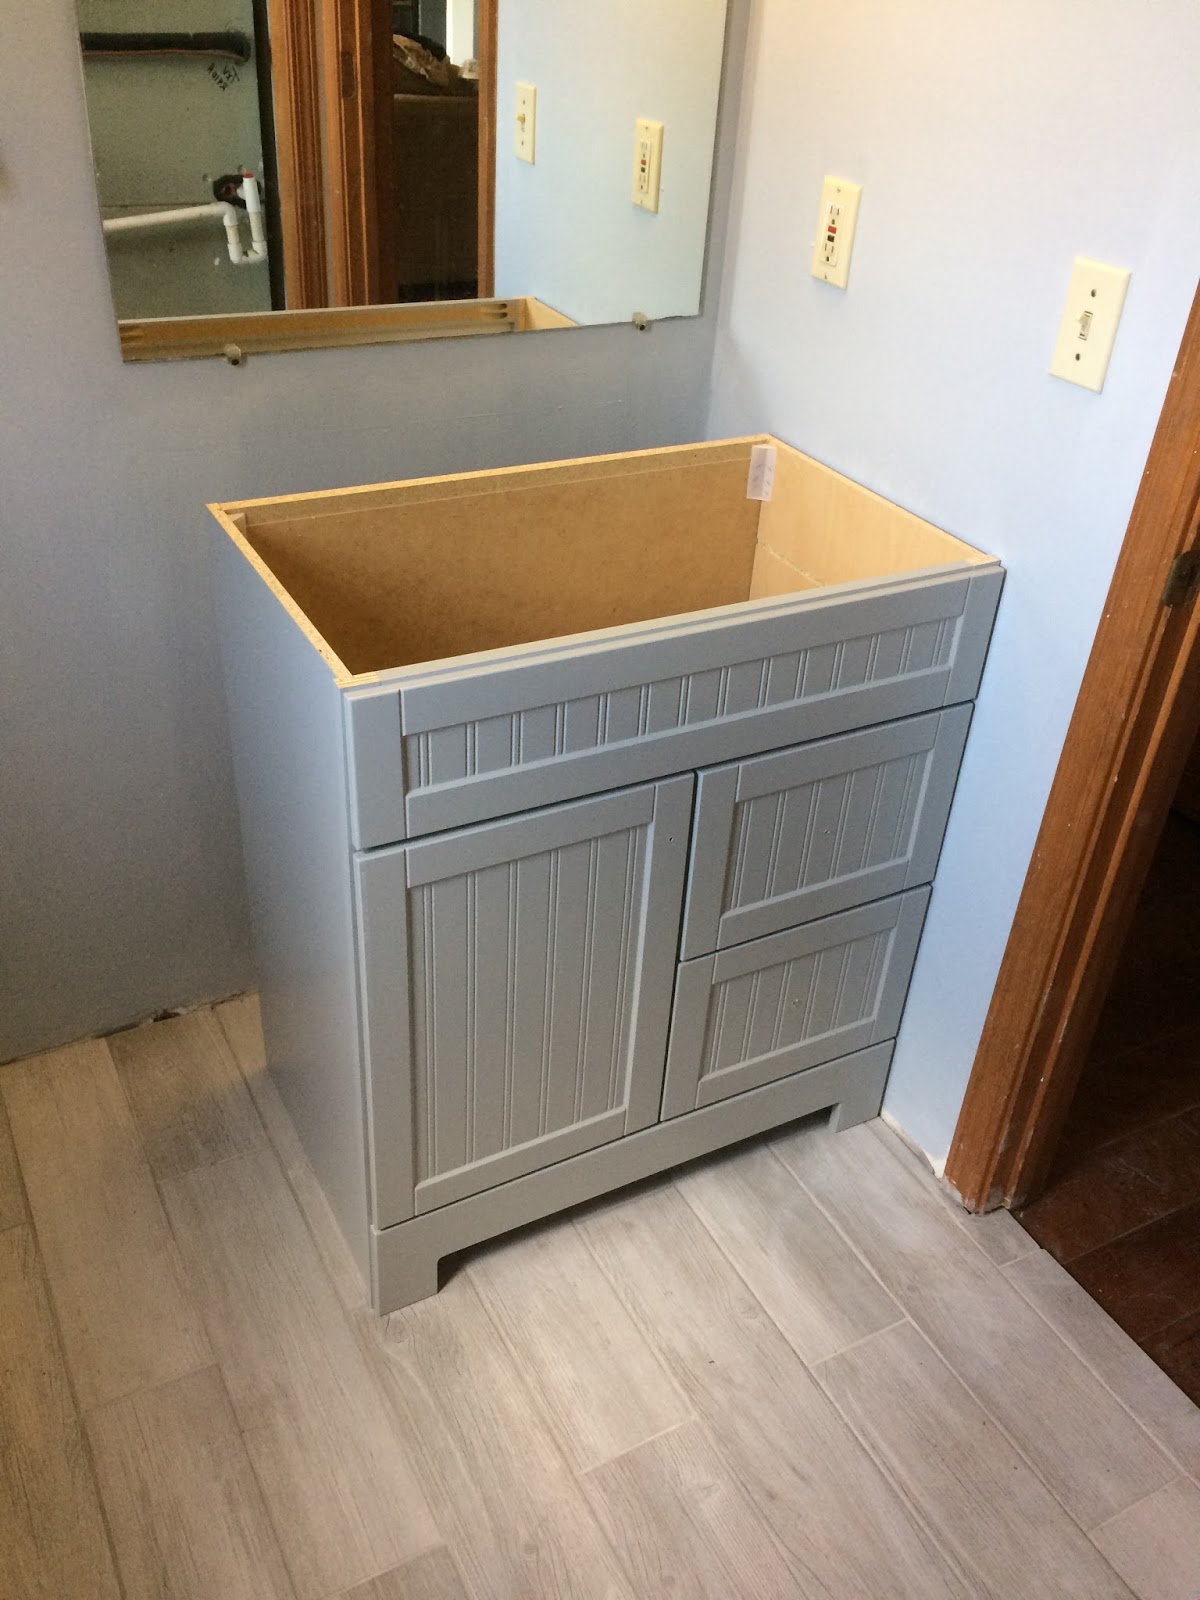
If you recall, yesterday I was facing a pretty significant issue with the vanity.  The drain line for the sink was sitting right up against the drawer track.  It was so close that I just wasn't sure I was going to be able to use this vanity.  And I loved this vanity after searching forever for one that would work!

So with the help of Pa and Ma yet again today, I measured.  And measured again.  And again.  The choice was literally coming down to 1/16th's of inches.  And since it was that close, did I want the drawer track to be weak where it mounted to the vanity?!  Agh, what to do?!

The vanity wasn't looking like it would fit with the drain line and the track of the drawers on the right side.
Well, after LOTS of measuring and eye-balling, I decided to go for it.  I was going to cut a hole in the vanity and try to slowly work my way over to the drawer track until the drain pipe fit.  The plan was fairly simple!  But in order to make the hole even smaller (and preserve more vanity strength) I removed the drain pipe from the wall so that the larger screw cap end wouldn't have to fit through the hole in the vanity.  I could now just use the smaller end that went into the wall (and through the vanity).

I started with a drilled pilot hole.  "Well, the vanity is now yours," said Dad.  Yup, no going back now.  And then I used a Dremel-style tool to cut my hole.  Of course, it went through the particle board material so easily.  And I slowly made my hole bigger!  And then bigger.  And then voila!  I had it!  The pipe fit through...and the drawer still had enough meat in the vanity to stay intact!

The gamble had paid off!  The vanity was a go!!!  So exciting!!!

The vanity is in!!!
And with that, the transformation of the bathroom took on full-steam.  The new tile floors were in.  The vanity was now set in place.  The sink was added.  The new faucet was installed.  The old mirror came down.  The wall was repainted.  The ugly box light came down.  And that's when we hit yet another snafu.  But it wasn't necessarily a surprise.  Just as we had discovered upstairs with the Master Bathroom light fixture, the electrician didn't really care about the drywall when he installed the fixture.  "Hey, this will be here forever."  "And if it's not, well, it's not my problem."  So rather than just a small hole for the Romex wire, he just ripped out an entire section of drywall which the light fixture would later cover up.  It's understandable...to an extent.  But now I was paying for his decision.

The huge mirror!

Bye, bye, mirror!

Look at that drywall!
Regardless, it was going to be another drywall patch job in a bathroom that was going to have more.  The drywall behind the toilet had been wet and moldy, so I removed a section along the floor.  I also decided to remove the long towel bar that hung over the toilet.  It was more for a shower towel rather than a hand towel, and I didn't care for the look.  So now I had several holes to patch...a job that I don't really like doing!  But it needed to be done.

The area behind the toilet.
So I cut out odd shapes of drywall and patched the various areas.

The long hole is now no more.

I cut out a section of drywall for behind the toilet.

And then started the patching job!  I'm awful at this!

The first coat of mud.
And then I hit another setback.  Such a common theme in this house!  With the new tile, the floor is quite a bit above the toilet flange.  So I purchased a toilet flange extension, but I had a very significant problem.  The tile installers didn't measure very well, and they covered up part of the toilet flange.  So when I tried to lay the new extension on top of the original toilet flange, it would not fit.  None of the holes line up.  This is a huge problem, actually.  The tile needs to be cut!  But it's already installed!

The tile covers the flange at the bottom of the picture.  I can't add the extension!
Dad recommended that I contact the tile installer and have him fix it, but just getting the tiles installed was a bit of an issue.  The more I reflect on the whole process, the more I realize I really didn't get the best guys in the business.  I'm noticing more and more errors in their work.  And after paying thousands of dollars, that's quite frustrating.  I'm still waiting on having the hardwood thresholds and trim installed, too!

And now this.  Frankly, I didn't even want to deal with the installers anymore, so I decided just to do the cut myself.  I tried with a Dremel-style tool, but that did nothing.  I tried to sand it with a power tool, but that did nothing.  I needed a tile cutter for a power tool, and it was worth the expense of a purchase rather than waiting on a crew that I didn't trust to show up.

So I headed to Menard's and bought two diamond-cutting blades for my saw.  And they were expensive!  Nearly $20 for one blade!!!  All for one cut!  I chewed on that decision for the day, and I finally decided that it was silly to spend that money on one cut.  So what if I'm set back for a little bit.  The contractor needs to fix his mistake.  I'll call him in the morning.

So that's the route I took.

While Dad and I were working in the bathroom all day, not to sit idle, Mom was feverishly working on cleaning my remaining floor trim pieces.  That's a boring project that I have not completed, but now that the floors are down, it's time to wrap up the whole project!  She was invaluable in those efforts.  So after the pieces were cleaned, back on they went!  What a difference the final touches make.  Seriously, it's the small things that just make the biggest difference.
So many pieces to go back up!

Mom working away at all the paint, dust, and hair!
So while I had to halt my process on the bathroom, other projects moved forward.  I am going to call the flooring contractor to see what he can do about the poor measuring in the bathroom.  I am ready to move forward.

I was able to sand and put a second coat on the holes in the bathroom, so they will be ready for paint tomorrow!  Little by little this bathroom is coming together!

Saturday, July 22, 2017

I'm An Idiot!!! (Painting the Wrong Color!)

You ever have one of those days?  You know, one of those days where you just wonder what in the world you were thinking?  You know, one of those days where you are excited to get something accomplished only to realize that YOU and YOU ALONE just doubled the time it will take to get it accomplished?

I firmly believe that everyone should buy a foreclosure at least once.  If only for the fact that you will be faced with challenges, regrets, excitements, failures, decisions, disappointments, and hopefully success.  It's truly a mirror-image of life.

Well, today, I found my failures and excitements all in one day!

Now that the bathroom tiles are complete, it was time to get the bathroom ready for the new vanity.  I went ahead with the modern grey vanity purchase (over the brown wood), and I was eager to get it installed!  Having to pee upstairs every day is a little different!  But first I needed to paint the walls behind the toilet and mirror.  I also elected to change the obscenely-ugly 1991 box light fixture and paint behind that, as well.

The wall behind the toilet needed painted.

As did the area behind the vanity.

Ready to paint!
Well, everything was going well...until it wasn't.  I found the grey paint and painted all of the white spots.  And then I decided to paint the scuff marks from my very abrasive construction crew that left some nicks and scuffs on the wall back when the floorboards were replaced.  I also searched for light spots in the living room and bathroom and touched up those spots, too.

It all sounds great, right?

Except for one very minor (HUGE!) problem:  I grabbed the wrong color paint.

We have a problem here.  The darker color wasn't because it was wet...

My efforts were all a waste!
I can't even make that up!  I painted my downstairs with a very light grey, and I painted my Master Bedroom with a slightly darker grey.  And, just as luck would have it, I grabbed the wrong gallon from my garage.  It was just off enough that when I painted, I merely thought the darker color was the paint being wet.  As with most paints, it would dry a slighly different color.  Well, my paint never dried (it did, it just looked like it was still wet!).  But it was a different color!

Agh!!!  That was my failure.

Of course, I realized my mistake, grabbed the right paint, and painted again.  But what a fiasco.  And what made it all the worse was all of the places I had "touched up" in the living room and bathroom.  I now had different color paint all over the house!

A touch-up to the right of the light-switch.

Touch-ups in the living room.

Touch-ups and painting along the baseboard.  It ALL had to be re-done!!!

How could I be so stupid?!  Well, it was an honest mistake...here are the two colors of grey.  One is right...and one is wrong.  Of course, I 100% chose the 50% wrong one!
Foreclosures (life) can be so frustrating at times!!!  It would all have to be re-done.

Well, the day wasn't all a failure.  I headed outside and did something I am good at:  installed more shutters!  Mom and Dad came over to help on this unbelievably sultry day.  I didn't even wear a shirt and STILL had to take breaks from the heat.  And I was working in the shade!  It was seriously so hot.

But the shutters went up, and the house looks sooooooooo good!  What a HUGE difference such a small change can make!!!

What a difference!!!

Such a simple change.

The house is becoming a home!!!
The house as I started today...

And the house at the end of the day!

The house as I purchased it in July 2016.
What a difference!

The house in July 2016.
I just LOVE the new look!
After the shutters, we headed inside to work.  After re-painting the bathroom walls the RIGHT color, I decided to install my vanity.  And then yet another setback!!!  The vanity has drawers on the right side, and the drain line was lined up right next to the drawer!!!  I was so disappointed!  I had searched forever for a vanity, and I finally found one I liked!  And now it appeared that it would not work!!!

The vanity going into place.

But I had a problem!!!

The drain line appeared to line up directly with the drawer.
What a day.  I started with a frustrating paint fiasco, had a successful shutter install, and ended with a vanity that won't fit!!!  Aghhhhh!!!  There is always something!!!  People think flipping houses is so easy.  Let me be the first to say, it's work!  And it's full of surprises!!!

I'm not sure what I'm going to do about the vanity.  It's just so frustrating!

But at least on the outside, the house now looks like a home!  Now if I can just figure out how to get that vanity to work.  I really want a warm, inviting exterior to lead to a modern, inviting interior!

We will see what tomorrow brings...

Friday, July 21, 2017

The Floors Are Done!!! And The Shutters are Here!!!

It's funny to me the projects you get most excited about.  Out of all of the major projects (flooring, water damage repair, paint), the one that I was most eager about since the day I purchased the house was something so relatively simple:  shutters.  Yup, shutters!!!

There is a backstory as to why, and it all started about five years ago when I was looking to add shutters to my house in Cleveland.  I had purchased a lovely brick foreclosure (short sale, actually) in pretty good condition, but it just looked...well, naked.  Ever since I purchased the home, it just needed SOMETHING.  And that something was shutters!!!  Such a simple addition took it from a stale, brick box to a warm and inviting home!

But in my research for colors and styles then, I stumbled across a website that I instantly fell in love with.  It was a guy's quest to explain the history of shutters...the why of shutters...and the absolute atrocity that we Americans commit in our shutter purchases!!!  I highly, HIGHLY recommend checking out the site, though I will admit, you will NEVER see houses or shutters the same way again.  It's almost a curse.  My sister has pointed out on numerous occasions that she can no longer see houses without the "shutter eye" anymore.  I'm telling you:  you've been warned.

If you want to forever see houses in the "What were they thinking with those shutters?!" mindset, then read this guy's obsession with shutters:  The Nasty Truth About Shutters  I'm not going to lie...his obsession has become mine, as well!  I drive past houses and am just drawn to ugly and improper shutters!

And now with that said, I was thrilled to add shutters to my house!  And I was also highly aware that my shutters were going to be installed improperly as far as the "purpose" of shutters!  But since shutters are now used as design-only, not function, on today's homes, I didn't care.  I just knew that my gross, grey, bland, no-curb-appeal house needed color.  It needed character.  It needed charm.  It needed shutters!!!

The house has no appeal!  Just a blah grey!
I have been looking forward to this day since back in July 2016 when I first set eyes on the home!  It has just never been a high priority on my to-do list.  But now that the list is getting shorter...

I power-washed the bottom half of my house a few months ago, and today I power-washed the top half.  The front of the house and garage faces north and was covered with a fairly thick algae.  I wanted to get rid of that before the shutters were installed.  I have used that $20 garage-sale power-washer sooooooo many times.  What a great purchase!

The shutters themselves were exceptionally easy to install!  Six screws for each panel.  They seriously went up in about 10 minutes a panel.  And what a difference!!!  I love the new look!

The window before...

And the window after!!!

One side is blah, the other side is charming!

The difference between top and bottom is so apparent!
I was able to get all of the lower window shutters installed today, and I couldn't be happier.  I will install the top half tomorrow, but I need a little bit of help with the ladder!

The bottom half is done and matches the front door color perfectly!
And while all of this was taking place outside, the flooring guys were wrapping up inside!  They came back to install the grout today.  And now the flooring in the house is 100% complete!  Woo hoo!

The tiles look great!

The new kitchen floor!

The new bathroom floor!

Ready for a new toilet and vanity!
All in all, it was a great day!  The house is really coming together!  I love it!