Sunday, April 29, 2012

Day Seven: The Massive Bathroom Project Revealed!!!

Well, I came home in nervous anticipation!!!  It's so fun having childlike Christmas Eve wonder as an adult.  I hope I never lose that!!!

Had he been here?!  Was it done?!  What did it look like?!  Did he remember to leave the black tiles as requested?!  Am I going to be pleased?!  Am I going to hate it?!  What did it look like?!

I eagerly climbed the upstairs and turned the corner!!!

WOW.  Wow wow wow.  My bathroom was sooooooo different!  It was soooooooo bright!!!  Agh, look at that tub!  It's beautiful!  Look at those white walls!  They look so clean!!!  My bedroom across the hall even had a different look!  It was so bright with the sun reflecting off of the new white tiles!!!

The new bathroom!!!  It is soooooooo white!!

I am so happy!!!


The bathroom is so different!!!

One of the best surprises was the original tub!!!  Look at those contour lines!  It's gorgeous!

Of course, I had to rush to get my new shower curtain!  I LOVE my new bathroom!!!

It doesn't even look like the same room!

I'm seriously oh so happy.
I was beyond pleased.  I literally had a brand-new bathroom on my hands.  The one big disappointment was that the company had left the tub drain and handles off, but a quick phone call chnaged that.  He had expected me to reinstall them, and I was kind of shocked at that.  Oh well, he came out and did it himself.  Perfect.

While here, he told me that this was one of his harder projects.  I guess my cast-iron tub was in horrendous shape.  It was filty and incredibly rusty.  They had to spend more time than they were used to sanding it down.  But their work paid off.

I love it!!!

Of course, the problem now is that I have no toilet...and my floor looks all the more hideous!  That needs to be changed soon!  Now that the rest of the room is bright white, the salmon floor is gross!!!

But this project exceeded my wildest expectations.  The cost to have everything refinished was $1200.  But I feel that I increased the property value way more than that.  This used to be the weakest room in the home.  Now it's an attractive, bright, and clean bathroom!

It's time to get the toilet and vanity installed and be done!!!

Saturday, April 21, 2012

Day Seven: The Massive Bathroom Project Almost Done!!!

After removing the vanity, I realized that I had a little bit of a problem. My shut-off valves that had been below the sink were more like almost shut-off valves. The water would slowly bubble out, crest, then overflow the end of the outlet. Sigh.

Removing the old vanity.  I found leaky shut-off valves (seen on the sink).

Thankfully the pipes were still in good shape with good threads.
A quick trip to Lowe's did the trick, though! I picked up two 1/4"-turn valves for under $5 apiece.  I also stopped at the Habitat for Humanity ReStore and picked up a used sink.  You may ask why.  Well, I had another crazy idea!!!  After pricing faucets, I came to conclude that they were outrageously expensive.  And after pricing used sinks, I came to conclude that Habitat couldn't get rid of them fast enough (seriously, the bathroom section is always full of sinks).  So I decided to scour the sinks and look for a nice-looking faucet!  I would then just return the sink to the store.  Basically, I was trying to score a nice Moen faucet for cheap.  I found one for $12.00 that originally sells for $60.00 in the store.  One of my favorite quotes is, "All cars run on used parts," and I have to say the same about sinks.  All faucets are used after the first handwash.  So why not?!

My sink I bought simply for the Moen faucet!!!
After arriving back at home, I was happy to learn that the 1/4-turn shut-off valves were easy to install. The old ones came off easily, and the new ones went on even easier.


Brand-new 1/4-turn shut-off valves installed!

I also installed a new set of water lines from the valves to the sink.  I removed the old toilet, and I was now set to have the tub refinisher come in and spray down my bathroom!

The new supply lines installed.  This bathroom is ready to be sprayed!!!


Agh, I'm so nervous and excited at the same time!!! I considered having him spray down the floors, too, but I am just going to go a different route with those...though I am not sure which direction yet.  So it was time to get some last Before pictures before he comes in and refinishes my entire bathroom!!!  Take a long hard look, because these are the last ones you will get of the salmon-colored tiles from floor to ceiling!!!

The toilet is removed!  It's refinish time!!!

Sooooo many tiles!!!

My last shot of the old tiles!  Sip her up!

This old tub liner should (hopefully) be covering up a structurally-sound cast-iron tub underneath!!!

What a dirty bathroom!!!

The view as you walk in the door.
Now it's just time to wait! What's crazy is that I won't even be around when he comes to spray down the bathroom! I'm just hoping it's everything I want it to be and more!!!  I work the day that we scheduled, and I will actually be out of town for two days after that!!!  I'm just hoping it all comes together!

Friday, April 20, 2012

Day Six: The Massive Bathroom Project

Well, today I pulled out the old vanity from the main bathroom.  I would venture to say that it's the original from 1939.  I had actually considered repainting the vanity (and had actually already begun the sanding!), but after further consideration, I just elected to go with a brand-new one.  Sometimes it's best not to repurpose...but to move forward.  This would be one of those times.  I have to admit that I was a bit disappointed since I already had some man hours in the project of sanding and wood-filling, but I had to get over that.  :)  The inside was just a bit too dirty...it had been wet at one point, and no matter how much I wished to show before and after pictures of a repurposed vanity, this one just had to go.  I just wish I had made that decision BEFORE I started working on it!

The behemoth of a vanity.  It was still decent wood, so I decided I would sand and paint it.
I took all of the handles and trim pieces off.

Before.  Yucky!

Getting ready for sanding and wood-filling.
I won't lie, it was a pretty wasted day.  I mean, I'm happy to have made the decision to get rid of this old behemoth, but I just didn't get too much accomplished today!  Oh well, such is what happens during a remodel project sometimes.

Saturday, April 14, 2012

Day Five: The Massive Bathroom Project!

Well, the tiles are in place.  Now it's just time to grout.  As I said yesterday, this is a first for me.  But I was pleasantly surprised to learn that this isn't all that difficult, either!!!  I tell ya, it's just take some gumption sometimes...of which I have plenty!  :)


The old ship ready for grout!

The old towel rack tile ready for grout!

Ready for grout!

Four new tiles ready to be grouted.
The most crucial part is getting the consistency just right.  I have found that it works best if it's in a peanut-butter like consistency...maybe a tad bit thicker.  It stays in the grooves quite easily without running out, and yet it's still easy to spread.  I had purchased a special grout application tool from Lowe's, and that did the trick perfectly.

In no time at all, I had grouted four tiles!  And I was a proud little boy.  It's so fun to learn new projects!

I am so happy with the results!

I might have a new calling in life...

I'm so glad I opted to not put a towel rack back in.

Just like new!

I was such a proud little boy after this project!


I had run out of time yet again, though.  I would have to wait another week before I could continue.

But the project is taking shape little by little.  And in order to whet my appetite, I had to go ahead and put up the shower rod and curtain that I had purchased.  But first, let me tell you about this shower curtain.  I have been searching HIGH AND LOW for a curtain that not only would I like...but would match my wall paint.  I never knew shower curtain shopping could be so difficult!  It's nearly impossible to find one!!!

Well, I found a model piece in Target...but since it was a model, it was only a few inches long.  But I LOVED it.  I mean, I loved it.  THIS was the one that I had to have.  The problem was that Target was clearing the shelves of bathroom items!!!  It was a seasonal change (I'm pretty sure I use the bathroom year round?!), and the shelves of numerous stores were empty in this bath aisle!  What is more, this particular curtain was being discontinued!  It was down to the curtains that remained on the shelves in the stores...and I checked several...even out of state!  I was so frustrated!

I quite literally had to run all around town trying to track down this single shower curtain!  Once one was found, I actually asked them to hold two for me!  Just in case.  :)  I made a drive nearly 15 miles out of my way just to get it!  But I love it...and I think I am going to be pretty pleased with the new bathroom.  (Also note the newly painted bathtub ceiling from yesterday...it makes a world of difference).

The shower curtain I would spend hours tracking down!
Agh, it's coming together!!!  This gives me a taste of what could be!!!

Friday, April 13, 2012

Day Four: The Massive Bathroom Project

Today didn't require as much physical energy as yesterday, and that was fine by me.  I'd be a happy man if I never had to remove another tile from an old house for the rest of my life!!!  That's just not fun work.

Well, today I decided that I was going to go a slightly different route with my painting.  I had already painted the walls of the bathroom, but I have now decided that I am going to carry that same color into the closet and above the bathtub enclave.  I went back and forth on both places, but the more I look at these areas, the more I think that each could benefit.

So with little sweating and zero hammering, I happily painted walls instead of broke tiles.

The closet before...

And after!
I don't have a picture of the area above the bathtub yet, but just know that it looks sooooooo much better being painted green!!!  More to come.

Thursday, April 12, 2012

Day Three: The Massive Bathroom Project

Well, I wasn't looking forward to it, but it was time to tackle the other two tiles.  And sad to say, as expected, they were not easy to remove, either.  I figured with the large protruding pieces of towel rack, the tiles would break off easily.  I was wrong.  The towel rack portion would indeed break off (though not easily)...but then I would have an uneven tile left for pounding after that.

The two black towel rack tiles to be knocked out.

Some of the hardest work I've ever done!  These were so difficult to remove.
Sigh.  This was not going to be a fun...or quick.

So with nothing more than muscle, sweat, time, and determination, I worked on removing the remaining two tiles.  It was certainly a chore, but I was finally able to remove them.  I had a couple of problems today.  First, now that the shower doors were gone, the pieces would literally fly all over the bathroom.  When I chipped them away, I could hear the tiny bullets hit all parts of the walls and floor.  Second, the left part of the towel bar was right in the corner.  This made it a little more difficult to chip out.  At times I just wanted to go crazy and hit the tiles like a mad man.  But I exercised restraint and just slowly chipped away...

The first tile is out!

Just one more to go...in a precarious place!

Before...

After!!!
Just like last week, these tiles created quite a mess in the bathroom.  Contrary to what the internet led me to believe, these tiles did NOT break into a few pieces and pop right out!  Someone needs to show a video of a 1939 house, not a 1989 house!!!  What a difference!

The two tiles in a slightly different form...

All swept together.
Just like last week, it's now time to install some bright white tiles to replace these huge black tiles.  After I wrap that up, I'll grout them...which will be another first for me.  But that's how you learn!

So yet another slow but successful day.  The remaining two tiles are out, and now I just need to install and grout them after they dry.  After that, I'll have to remove the toilet and vanity, and this bathroom should be ready to be refinished!!!  Slowly getting there...

Saturday, April 7, 2012

Day Two: The Massive Bathroom Project

I love the internet.  The problem with the internet, though, is that I have every possible remodel project at the palms of my hands!  And I have learned over the years that if there is one thing that I know, it's that if someone else can do something, then so can I.  (Be careful:  This can get you into BIG trouble on some projects!).  But it sure is fun for me to get ideas, test them through other's mistakes/successes on the internet, and then try them myself.

This bathroom project was to be no exception.  So here's the deal.  I have NEVER worked with tile before.  I have really had no reason to work with tile.  But now I have a bathroom that is covered in hundreds of salmon-colored tiles.  And after some hard thinking, I have decided that I am going to KEEP THEM!  Yup, you read that right...not only am I going to go with refinishing my tub, but I am going to go ahead and refinish my entire bathroom, as well!!!  Agh, it sounds downright crazy.  But the more I read, the more I am convinced that this could work!  It's not the cheapest project, but it will save me thousands over a full bathroom tear-out and remodel.

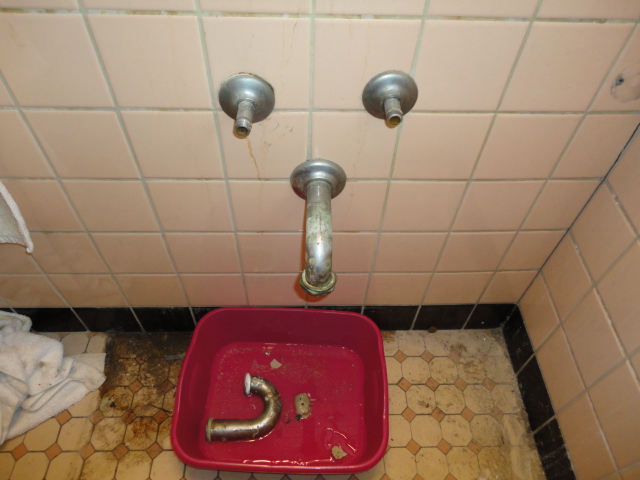
The problem is that I have to get the bathroom ready to be painted.  Basically, the tub refinishers come in and prep and paint the tubs and tiles.  But that's it.  That's their job.  It's like taking an old car and having it redone.  The painters do the sanding and painting.  But first there needed to be some "body work" done.  That was my job.

The first order of business was removing two Christopher Columbus ship tiles IN my tub!  I didn't want them, and they needed to go.  I had NO idea just how difficult that would be.  The internet videos and blogs all told me it was going to be easy.  I went to Lowe's and bought the necessary tools, and I started grinding down the grout.

One of the two colorful ships in my tub.  The tiles were actually raised grooves, so I couldn't just paint over them.
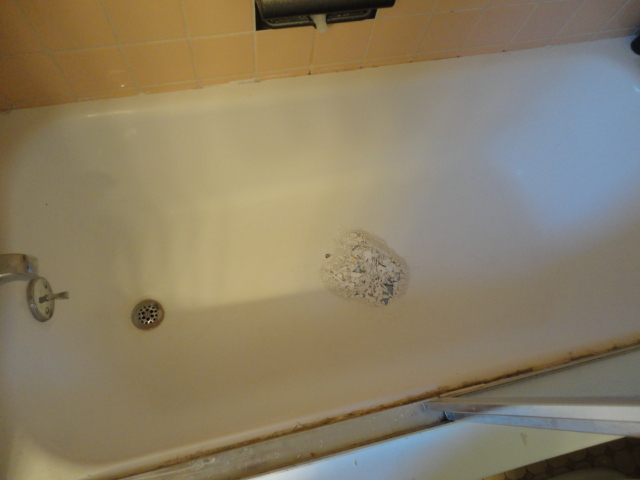


Inside the bathtub.
Well, I grinded and grinded and grinded.  This stuff was (like?) concrete.  I'm learning that this house is structurally sound.  All of the videos that I watched were from homes built in the last 20-30 years.  If someone wanted to tear out a tub, they just took a hammer to it, and it broke into large pieces.  Well mine, not so much.

I would literally spend an hour on EACH tile!  I would grind down the grout with a special tool and then start chipping away the tile, trying to break it.  The problem was that the mastic on the back was so strong that the tile wouldn't budge.  It would literally break into a MILLION pieces!!!  I had to wear eye and hand protection as these pieces were flying off like bullets in every direction.  Every smash of the hammer would send pieces flying.  But the pieces were so tiny!!!

I was getting nowhere fast.  So it took me two hours for two tiles.  Sigh.

The two tiles now removed after hours of work.

They did NOT break up into large pieces at all like others said!  Millions of tiny fragments.
What work this is!  It's tiring swinging a hammer that many times!  And it's just downright amazing at how little progress I make.  I decided to go ahead and remove the glass shower doors, too.  I didn't care for them, as they seemed too 1980's for me, so I had no problem taking those off. And it was very simple. I just removed some screws from the tile walls and pulled the rest off. It was caulked something fierce onto the tub liner, but that liner was going to go anyway. I didn't care.  I was amazed at how much bigger the bathtub area appeared, though!  It was like its only little enclave now!

Before removing the shower doors...
After removing the shower doors!
The large amount of caulk and sealant below the old glass shower doors.
Now for the rest of the story.  I had originally planned on removing only the two ship tiles, but after removing the shower doors, I noticed that a previous owner had simply just chipped away at an old tile towel bar rack in order to get the doors in.  Some people!!!  Agh, just do a project right, please!!!

Where the shower door used to rest.  The previous owner just simply cut away the tile to make it fit.  Sigh.
So I was now stuck with replacing a towel rack tile piece.  I searched high and low for one and actually found hundreds at a local Cleveland ReStore but none in my style.  But the more I thought about it, the more I was ok with just getting those tiles out of there.  I didn't need a towel rack IN the tub.  I already had to remove one of the tiles...so why not just remove both...

Oh, boy, what had I just decided.  That project would have to wait until another day...I didn't have enough arm strength left.